A Step-by-Step Guide to Safely Rigging Your First Stretch Tent: Field Manual for Riggers
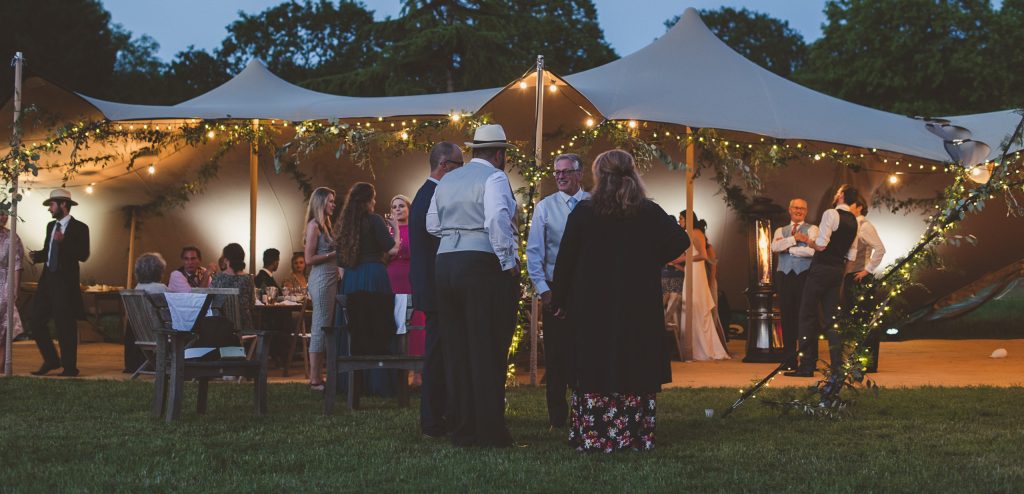
Pitching a commercial stretch tent is both a structural engineering task and an art form. Unlike traditional frame marquees or rigid pole tents that assemble in fixed, predetermined geometric shapes, an architectural stretch canopy responds dynamically to site topography, line tension, and pole placements. A skilled rigging crew can transform a single flexible membrane into a striking two-peak canopy, an enclosed storm shelter, or a sprawling open-sided shade structure.
However, the flexibility of stretch architecture also means there is zero room for error in structural safety. A poorly tensioned corner, an incorrectly driven anchor peg, or an unpadded center pole can lead to fabric tears, water pooling, or structural collapse under dynamic wind loads. This comprehensive step-by-step field manual details the exact operational workflow professional riggers use to safely layout, anchor, elevate, tension, and inspect commercial stretch tent setups.
Phase 1: Pre-Rigging Site Inspection and Safety Audit
Before unrolling a canopy membrane or driving a single steel stake into the ground, the field supervisor must complete a thorough site assessment. Conducting a 10-minute pre-rigging audit prevents costly site damage, equipment destruction, and crew injuries.
1. Underground Utility Identification
Driving 800mm to 1000mm steel rebar pegs into the ground carries severe risks if subterranean utilities are present. Striking an underground electrical cable, high-pressure water main, gas pipe, or fiber-optic line creates massive safety hazards and financial liabilities. Always verify utility locations with property owners or use electromagnetic cable detectors before driving metal stakes.
2. Overhead Clearance and Hazard Audits
Inspect the vertical airspace above the setup footprint. Maintain a minimum safety clearance of 3 meters from high-voltage overhead power lines. Identify overhanging tree branches that could snag, puncture, or drop sticky sap and tannins onto the canopy membrane during the event.
3. Topography and Wind Vector Evaluation
Analyze site slope, soil density, and prevailing local wind directions. In coastal or high-wind environments, plan your setup orientation so the lowest, most securely anchored side of the tent faces directly into the incoming wind vector. To calculate exact footprint clearances, guy wire offsets, and boundary obstacles before arriving on site, consult our master stretch tent planning guide south africa.
Phase 2: Unpacking, Ground Protection, and Fabric Layout
Protecting the canopy membrane from mechanical damage and dirt during layout is essential for preserving the asset’s visual appeal and waterproof coating.
Step 1: Laying Down Ground Tarpaulins
Never unroll a commercial stretch canopy directly onto raw dirt, gravel, dry twigs, or asphalt. Lay heavy-duty PVC drop cloths or groundsheet tarpaulins across the entire layout footprint. These ground sheets keep white and organic-colored fabrics pristine and prevent sharp stones from puncturing the elastomeric membrane while crew members walk across it.
Step 2: Position and Orient the Membrane
Unroll the stretch tent canopy along the center axis of your planned footprint. Unfold the fabric outward toward the perimeter edges. Ensure the coated, weather-resistant top side faces upward and the soft backing layer faces downward toward the ground sheet.
Phase 3: Perimeter Ground Anchoring Mechanics
The golden rule of stretch tent rigging is: Always establish and tension your ground anchors before inserting center support poles. Elevating a canopy without secure ground anchors allows wind gusts to catch the unanchored fabric like a massive sail, dragging crews across the site.
Step 3: Calculating Anchor Distances and Angles
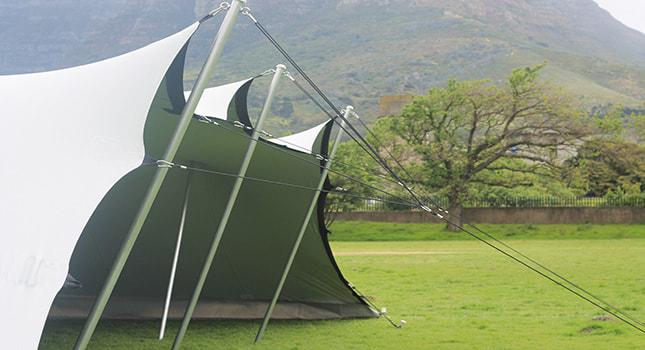
Measure your anchor placement points relative to the canopy edge. Perimeter ground pegs should be driven into the earth at a distance equal to the height of the perimeter poles (typically 2 meters to 2.5 meters away from the canopy edge). This geometry ensures a 45-degree guy line angle, balancing horizontal tension with vertical holding resistance.
Step 4: Driving Steel Pegs
Using heavy sledgehammers or pneumatic post drivers, drive heavy-duty 800mm to 1000mm ribbed rebar pegs or T-stakes into the ground at a 45-degree angle pointing away from the tent center. Drive the stake until no more than 75mm to 100mm of steel remains exposed above the grass line. Explore our complete selection of commercial-grade steel stakes in our peg anchoring accessories department.
For installations on concrete slabs, paved courtyards, or asphalt parking lots where peg driving is impossible, install heavy-duty drop-in mechanical anchors or concrete ballast systems sourced from our permanent tent installation accessories catalog.
Step 5: Attaching Corner and Perimeter Ratchet Lines
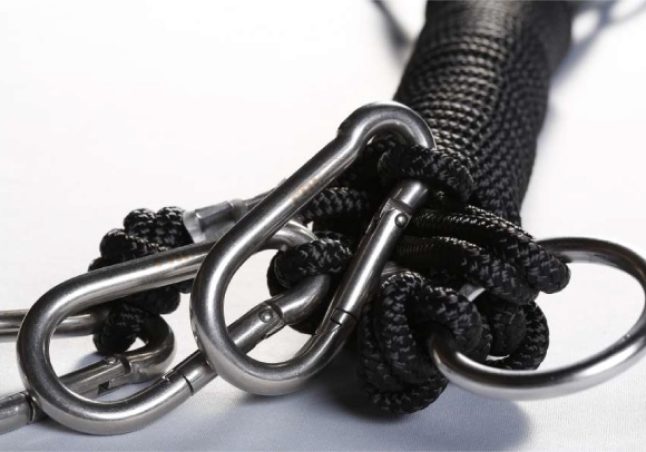
Connect heavy-duty 50mm polyester ratchet straps or high-tensile static ropes to every corner tab and perimeter loop along the canopy edge. Secure the opposite end of the strap to the driven steel peg using rated steel bow shackles or forged carabiners. Never tie knots around raw rebar; sharp steel edges can slice through synthetic fiber lines under tension. Stock up on certified rigging hardware from our rope carabineers and related accessories section.
Phase 4: Support Pole Selection, Preparation, and Insertion
Once all perimeter guy lines are loosely connected to their ground anchors, prepare the upright poles that will raise the canopy membrane into its three-dimensional architectural form.
Step 6: Pole Preparation and Protective Dome Caps
Whether using modular aluminum poles or solid eucalyptus timber posts, every pole top that contacts the fabric underside must be fitted with a smooth, high-impact rubber or PVC dome cap. Placing bare metal tubing or sharp wood edges against stretch fabric will punch a hole through the membrane under high tension.
Prepare your poles with baseplates, internal joiners, and fabric-protective top domes selected from our pole related tent accessories inventory.
Step 7: Inserting Center Masts (The Lift Phase)
Erecting the center poles requires coordinated teamwork. Assign riggers to specific pole positions:
- Crews lift the main center pole and slide it under the canopy membrane toward the designated center cap point.
- Position the base of the center pole onto a heavy-duty, anti-slip baseplate set firmly on the ground sheet.
- Push the center mast vertically until it stands at a 90-degree angle to the ground. Maintain manual support at the pole base until initial line tension is applied across the perimeter ratchets.
- Repeat the process for secondary center poles or intermediate quarter poles according to your design layout.
Step 8: Elevating Perimeter Upright Poles
Insert perimeter side poles into the outer edge tabs around the canopy boundary. Angle perimeter side poles slightly outward (5 to 10 degrees away from the tent center). Outward angling uses the natural downward pull of the guy lines to lock the pole base into position, preventing the uprights from kicking inward during wind gusts.
Phase 5: Fine-Tensioning, Profile Shaping, and Safety Inspections
With all poles inserted, the tent structure is up, but it is not yet safe or weatherproof. Final tensioning gives the stretch tent its smooth, wrinkle-free appearance, high wind resistance, and proper water drainage channels.
Step 9: Balanced Perimeter Tensioning
Systematically work around the perimeter, tightening ratchet straps in pairs on opposite sides of the structure (similar to tightening lug nuts on a vehicle wheel). Tightening one side completely before adjusting the opposite side pulls center poles off vertical alignment and creates uneven fabric stress.
Ratchet the guy lines until the canopy fabric stretches smoothly without sagging, deep wrinkles, or scalloped stress lines. The fabric membrane should feel tight and firm when tapped with an open hand.
Step 10: Pitch Inspection for Water Drainage
Inspect the roof profile from a distance. Verify that all roof planes maintain a minimum slope angle of 20 to 30 degrees to ensure fast rainwater runoff. If low pockets or flat spots exist between center poles, raise intermediate pole heights or adjust perimeter guy line tension to eliminate potential water pooling zones.
To ensure your chosen fabric dimensions provide adequate edge drop and roof pitch across your layout, review our sizing guide on how to choose the right stretch tent size for your event.
Phase 6: Site Finishing, Safety Hazard Mitigation, and Handover
A professional installation prioritizes public safety and aesthetic perfection. Eliminate physical hazards before handing the site over to clients or event planners.
Step 11: Hazard Mitigation and Line Tidying
- Peg Hazard Safety: Cover every exposed steel peg head with high-visibility bright rubber caps or mushroom toppers to prevent trip and cut injuries.
- Strap Management: Roll up excess ratchet webbing tails neatly and secure them to the tensioned strap using heavy-duty velcro ties or tape. Loose webbing tails flapping in the wind cause friction noise and look unkempt.
- Groundsheet Removal: Pull the protective ground drop cloths out from underneath the tent, wipe down any dust from pole bases, and clean the surrounding floor area.
Step 12: Final Structural Load Check
Perform a final walkthrough checklist before sign-off:
- Verify that all center pole bases sit securely flat on their baseplates without slippage.
- Check that every ratchet mechanism is fully closed and locked in its safety detent.
- Ensure all perimeter shackles and carabiners are fully threaded or latched shut.
Rigging Troubleshooting Guide
| Observed Field Problem | Probable Cause | Corrective Field Action |
|---|---|---|
| Deep diagonal wrinkles running from center pole to corner | Uneven line tension; corner ratchet over-tightened relative to side ratchets | Ease corner ratchet tension slightly; increase tension on adjacent perimeter side lines until wrinkles smooth out. |
| Canopy edge fluttering or flapping loudly in wind | Insufficient perimeter tension; perimeter guy wire angle too shallow | Move perimeter peg closer to maintain a 45° angle; ratchet perimeter guy line to full tension. |
| Rainwater pooling in fabric pocket between poles | Inadequate roof pitch angle; intermediate pole height set too low | Extend telescopic center/quarter pole height; increase perimeter line drop to steepen roof slope. |
| Center pole leaning off vertical axis | Unbalanced opposing guy line tension pulling mast off center | Loosen guy lines on the side the pole is leaning toward; tighten guy lines on opposing side until pole stands 90° vertical. |
Teardown, Washing, and Maintenance Protocols
Striking a stretch tent setup requires executing the installation process in reverse order: Remove center poles first while perimeter anchors remain fully tensioned, lower the fabric controlled to the groundsheet, then release ground pegs.
Never fold or pack away a damp stretch canopy inside its PVC transport bag for more than 24 hours. Trapped moisture triggers rapid mildew growth, foul odors, and permanent fabric staining. Once back at your warehouse, unroll dirty or damp canopies on a clean washbay floor, wash both surfaces with soft brushes and specialized pH-neutral cleaners, and allow the fabric to air-dry completely.
Follow our comprehensive step-by-step master guide on how to clean and maintain a stretch tent to preserve fabric elasticity and waterproof coatings. Stock your warehouse maintenance bay with professional cleaning solutions from our general tent maintenance accessories catalog.
Mastering Professional Rigging Standards
Safely erecting commercial stretch architecture requires high-grade hardware, an understanding of dynamic force loads, and methodical field procedures. By following structured site audits, establishing proper anchor angles, utilizing protective pole caps, and executing balanced line tensioning, your crew guarantees site safety and delivers stunning visual results for every event.
To view diverse architectural layouts, multi-tent links, and custom setups, explore our project showcase in the gallery. Learn more about our manufacturing standards on our about us page, or reach out to our technical rigging specialists via the contact page for hands-on crew training, hardware supplies, and custom stretch canopy orders.